When people think of photography they usually think of a snapshot that freezes a moment of time in a frame at 1/1000th of a second or shorter. However, photography can be much more than that with the correct gear or conditions. Long exposure photography is only possible naturally during the night and can produce interesting effects of motion blur effects or star trails. I will go into star trails and night photography in another post but here's an example of where a long (30 second) exposure can be used to create blur in passing car's headlights. No filter was need for this photo since base ISO was used.
 |
| 30" exposure after sunset using no filters |
It is possible to shoot long exposures during the day but it requires neutral density (ND) filters which are dark pieces of glass that block the majority of light from entering the camera and being registered by the sensor. There are different strengths of ND filters available, rated by their ability to absorb light in f stops. They range from 1 stop to 10 stops of light reduction. A circular polarizer (CPL) also acts as a ND filters and usually has about 3 stops of light reduction.
Whenever I'm out shooting landscapes, I always get asked
what types of filters I am using and why I use them. When I was first
starting out, the idea of putting pieces of glass in front of my lens
didn't make much sense but now my glass feels naked without them there. It will
take some time to get used to using filters but it's well worth it. Most things that
filters used to do can now be done now in post-production or via exposure
bracketing. However, a polarizing effect and long exposure effect can not
be accurately reproduced during post so no matter what people tell you,
there is still a need for using filters in photography. The graduated neutral density (GND) filter
effect can be done in post production and some people don't use them
but I like getting the image as close to correct as possible to being correct in
camera so I still use the GND when the situation calls for it.
 |
| 30" exposure. notice silhouette of of person on lighthouse |
When choosing what filters to purchase, although there are cheaper
options, it is worth getting high quality filters and polarizers or else
they will provide a
color cast which can't be corrected in post-production. I recommend
getting only Lee, Hitech, and B&W filters no matter your skill
level, you
will be able to notice the difference.
There are a couple options when choosing what type of filter is right for you. There are circular filters that screw onto your lens's threads like the
B&W 10 Stop ND Filter and the
Variable 2-8 Stop ND Filter which I've heard good things about. These types of filters work well but can cause vignetting in some situations and can be cumbersome to take on and off. They are mainly used by amateurs who are first getting into long exposure photography and while they are great at what they do they aren't as versatile as having a filter holder using square or rectangular filters.
 |
| Adding filters to my foundation kit at a river in Thailand |
I use a
Lee Foundation Kit which attaches to your lens via an adapter that screws onto the lens. The Lee foundation kit has 3 filter slots so a variety of filters can be used. I use the
Lee Big Stopper which is a 10 stop ND filter but very hard to find in stock. Hitech makes a
10 Stop ND Filter that is easier to come by. I also use a
Lee 3 Stop ND Filter which is great for situations where you don't want as long of an exposure as the 10 stop filter. I almost always use a
Lee 4x4 Circular Polarizer which besides acting as a 3 stop neutral density filter also intensifies blue skies, increase color saturation, and eliminates unwanted reflections. I keep a
Lee 3 stop GND Filter in my bag to use where part of my image is brighter than the other part like during a sunset where the sky is much brighter than the foreground. To hold all my filters in one place, I use this
Filter Bag.
 |
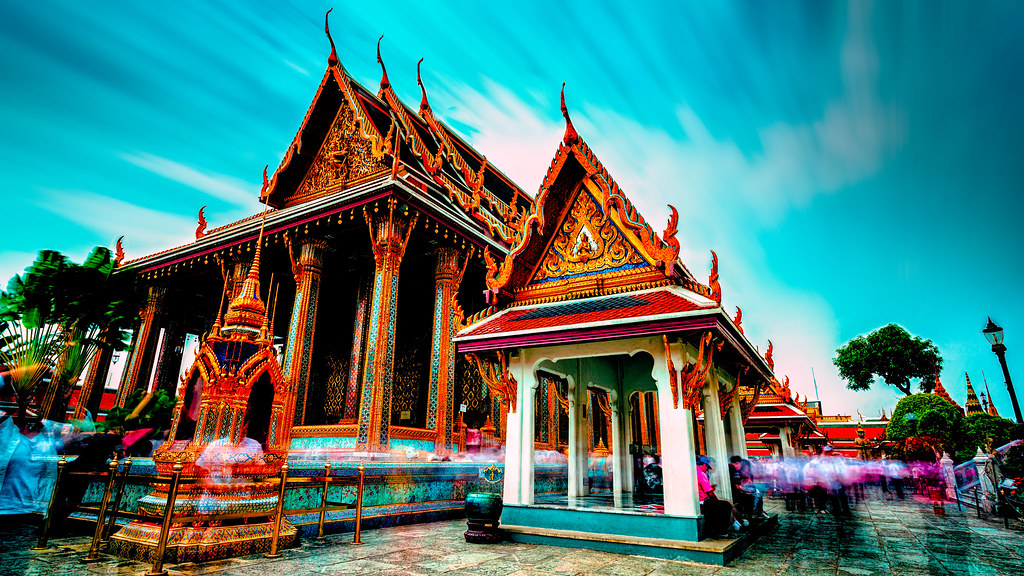
| Blurred people and sky at the Grand Palace in Thailand |
Having a good quality tripod is essential for creating a good long exposure as your camera needs to be completely still for at least 30". There are many tripods out there but I currently use a
Feisol 3441-T carbon fiber tripod/head combo. I've also have the less expensive but larger
Manfrotto 055XPROB aluminum tripod with
498RC2 head and use it with great results.
Once you have the correct filters, play around with different combinations to find a style of long exposure photography that you like. For example, try stacking a CPL and 10 Stop ND filter and take a mid-day photo at base ISO at the ocean or river. Or use a 3 stop ND, GND, and CPL during sunset which will allow you take a 30 second photo and get a nice motion blur of your subject. The effect in a crowd is also cool, if people are moving they won't show up in your photo. If they stop briefly they may appear semi-transparent or blurred which creates motion in the scene depending on exposure. There is no wrong answer here, think of these filters as a tool once you have more experience, you'll start to get a better feel of situations that will work for long-exposure photography and situations that won't work.
 |
| 180" exposure flattens out waves and blurs clouds |
Figuring out the correct exposure settings for a long exposure can be tricky, especially at night. For long exposures, I always use the "live mode" to both focus and meter my shot. When using 10 stop filters, it is sometimes necessary to take off the filters to focusing the shot. Once the shot is focused, the filters can be put back on so correct metering can be achieved. In camera, you are limited to the maximum exposure time of 30". With a intervalometer, you have the ability to use "Bulb" mode to take exposures for as long as you wish. I recommend this affordable offbrand
intervalometer which I use that does a fine job but only costs a fraction of what Canon's does. I always use aperture priority mode and set my aperture to f/8. I then lock in the ISO at 100 and let the camera meter the shot. I find that setting the EV to +1 is the way to go as it gives more shadow details. If the camera metering is not working well, you can deduce the correct exposures using the following formula:

T(n) = t x 2^n
n = Total stop value of all ND filters you are using
t = Metered shutter speed without filters attached
T(n) = Exposure time to use
If you don't like to deal with math (like me) you can do a short high ISO shot with your filters attached and lower the ISO while increasing she shutter speed. Each time you lower the ISO one stop, double the exposure time. If that is too difficult or to make subtle changes, just use your camera's metering to get the exposure and change your EV to +2 or +3 or whatever is necessary. For longer shots this might not be ideal but it works and as a bonus you could then even do an HDR (I'll do a separate post on HDR's/exposure bracketing sometime in the future)
Feel free to comment if anyone has questions regarding anything I covered in this post and get out there shooting!

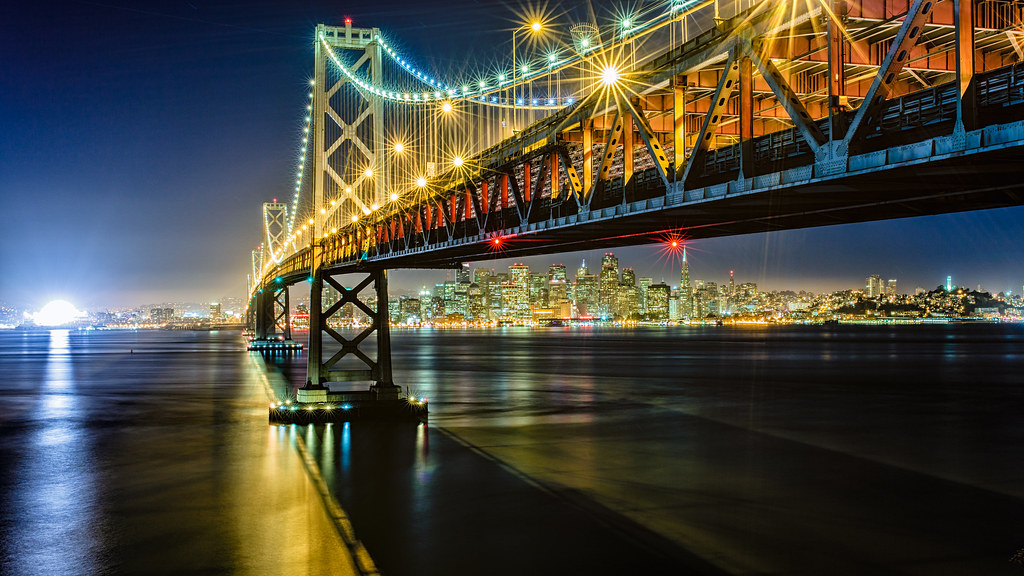


 Choosing a composition for night photography is similar to photography during the day except you don't need to worry about the sun. That being said the sun does influence the sky during twilight. Although the sun has set and there is no longer visible color in the sky
that doesn't mean it is time to pack up your gear and go home. In fact some of the more
spectacular images are taken during this time of limbo between light and
dark which is called the "blue hour" by photographers as the sky is a
rich blue color and some of the residual colors of sunset still remain. This period is sacred to photographers as the light is at its best. Later on in the night the sun isn't a factor but you may notice light pollution coming from cities and towns that can dominate your frame. The lights are much brighter than can be seen with the naked eye and can create some neat effects and colors if used to your advantage.
Choosing a composition for night photography is similar to photography during the day except you don't need to worry about the sun. That being said the sun does influence the sky during twilight. Although the sun has set and there is no longer visible color in the sky
that doesn't mean it is time to pack up your gear and go home. In fact some of the more
spectacular images are taken during this time of limbo between light and
dark which is called the "blue hour" by photographers as the sky is a
rich blue color and some of the residual colors of sunset still remain. This period is sacred to photographers as the light is at its best. Later on in the night the sun isn't a factor but you may notice light pollution coming from cities and towns that can dominate your frame. The lights are much brighter than can be seen with the naked eye and can create some neat effects and colors if used to your advantage.