
 |
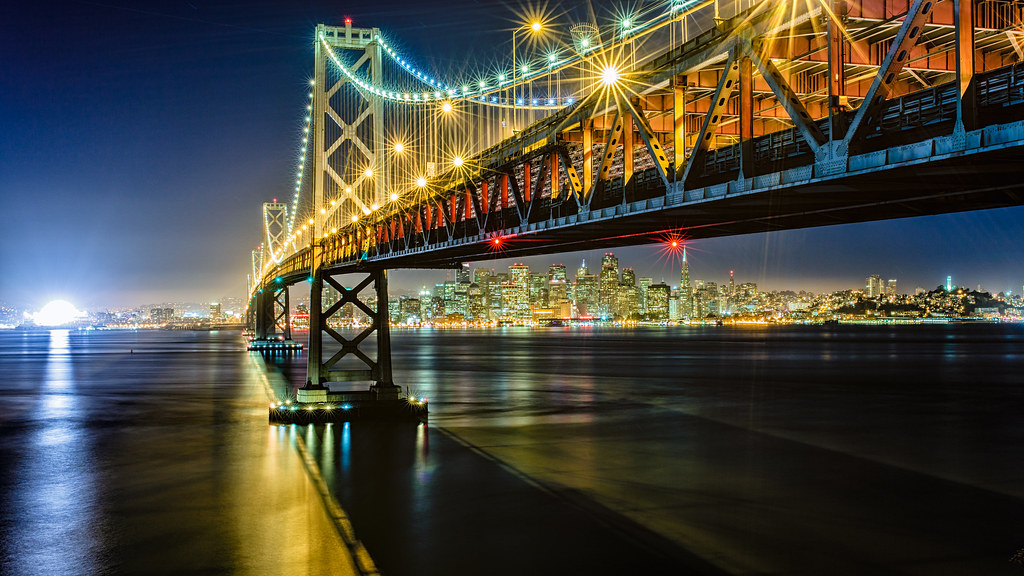
| 105 second exposure taken after sunset |
 |
| Headlights from oncoming cars illuminate the forground |
To start things off lets go over the basics. Photography is all about the capture of light. That principle stays the same no matter what time a photo is taken and is part of what makes night photography so intriguing. Since there is less visible light at night than during the day it is necessary to use a longer exposure to get an image that is adequately exposed. Once you start dealing with exposures longer than 1/60th of a second, having a good quality tripod becomes essential for creating sharp images. There are many tripods out there but I currently use a Feisol 3441-T carbon fiber tripod/head combo. I've also have the less expensive but larger Manfrotto 055XPROB aluminum tripod with 498RC2 head and used it with great results.
In camera, you are limited to the maximum exposure time of 30" which may seem like a long time but there are applications where exposures longer than 30" are necessary. With a intervalometer, you have the ability to use "Bulb" mode to take exposures for as long as you wish. I recommend this affordable off-brand intervalometer which I use that does a fine job but only costs a fraction of what Canon's does. I always use aperture priority mode and set my aperture based off of the depth of field I want for the exposure. I then lock in the ISO at 100 and let the camera meter the shot. I find that setting the EV to +1 is the way to go as it gives more shadow details. I then take a look at that exposure and make changes if necessary.
For night landscape photography, it can be difficult to light the foreground of a scene when exposing for the night sky. There are a couple ways to light the foreground. First, you can take an exposure optimized for the sky, then take another one optimized for the foreground and can blend them together in post-processing.
 |
| Flashlight was used to "paint" the foreground of this shot |
 Choosing a composition for night photography is similar to photography during the day except you don't need to worry about the sun. That being said the sun does influence the sky during twilight. Although the sun has set and there is no longer visible color in the sky
that doesn't mean it is time to pack up your gear and go home. In fact some of the more
spectacular images are taken during this time of limbo between light and
dark which is called the "blue hour" by photographers as the sky is a
rich blue color and some of the residual colors of sunset still remain. This period is sacred to photographers as the light is at its best. Later on in the night the sun isn't a factor but you may notice light pollution coming from cities and towns that can dominate your frame. The lights are much brighter than can be seen with the naked eye and can create some neat effects and colors if used to your advantage.
Choosing a composition for night photography is similar to photography during the day except you don't need to worry about the sun. That being said the sun does influence the sky during twilight. Although the sun has set and there is no longer visible color in the sky
that doesn't mean it is time to pack up your gear and go home. In fact some of the more
spectacular images are taken during this time of limbo between light and
dark which is called the "blue hour" by photographers as the sky is a
rich blue color and some of the residual colors of sunset still remain. This period is sacred to photographers as the light is at its best. Later on in the night the sun isn't a factor but you may notice light pollution coming from cities and towns that can dominate your frame. The lights are much brighter than can be seen with the naked eye and can create some neat effects and colors if used to your advantage.Stay tuned for Part 2 of this post concerning astro-photography, star trails, and photographing the Milky Way and as always if anyone has any questions about this post, reply below and I'll do my best to answer them.
No comments:
Post a Comment